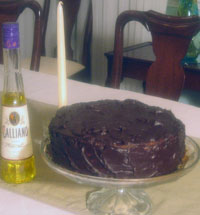
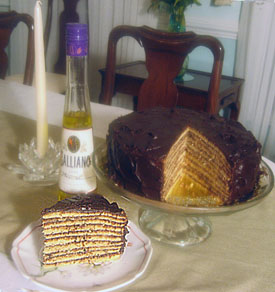
To introduce this recipe we must turn the clock back to around 1607. At the time history records the epic journey of John Smith et al. to a location that became Jamestown in Virginia, the first permanent settlement by non-native Americans in what eventually became the U.S. Soon Jack Smith befriended a native American woman by the name of Pocohantas as we all know. What we did not know is that Ms. Pokey followed Jack around as he explored the southern parts of what became known as the Chesapeake Bay.
Amongst his stops along the bay Jack landed on an island that, at his request, immediately became known as Smith Island. With Pocohantas in tow Jack settled onto the island for a time and, getting a bit hungry, asked Pokey to bake him a cake, which she did obligingly from scratch, without a word of protest. Repeating this feat time and again, eventually Pokey’s magnificent creation became known as the Smith Island Cake. That’s the story – or close to it.
Now be aware that Smith Island Cake is no ordinary delicacy. Eventually it became so popular that the Maryland General Assembly passed a resolution naming it as Maryland’s official dessert. Maryland also has an official bird (the oriole, not the raven) and other random official state creatures and artifacts like most other states. All of that aside, making this historical goody at home is a challenge of huge proportions for all but card-carrying Smith Islanders, make no mistake.
While multi-layer cakes have been around since time immemorial I haven’t run across any that call for ten layers separated by a filling of one kind or another. The Smith Island Cake – if you’re setting out to reproduce the traditional – is a ten-layer production and the layers are separated most often by chocolate filling. Before we get into this more deeply think about how you will go about creating ten cake layers each of which is about one quarter inch in thickness and maybe less. The logistics are daunting.
 Research uncovered a recipe published by the Washington Post in 2008 and attributed to the late Smith Islander Frances Kitching (owner of Kitching’s Kitchen maybe??) reportedly the first to create the ten-layer production model. Not being much of a baker (all my carbs come from pizza and pasta per doctor’s orders) I nonetheless decided to take this on for a house party. I immediately began searching my mind for a shortcut that would not compromise the original in any way.
I also racked my brain for a slight variaton that would render my effort not only somewhat unique but also introduce an unobtrusive, but for me most obligatory Italian nuance to the project. FYI there are no Italian descendants on Smith Island. I checked.
The shortcut consists of baking two layers at a time with two 9-inch round cake pans thus requiring only 3 oven round trips. The layers were then meticulously separated with the help of a long thin fish filet knife, the only tool that will do the job. Actually since I embarked on the project I discovered that today one can obtain from an on-line catalog one of those nifty layer cutters that will supposedly yield eight thin layers. That would cut the oven round trips to two, assuming the gadget performs as advertised.
The “nuance” I boldly introduce is the brushing on each layer of about 1/4 cup or so of sugar syrup spiked with Galliano lemon liqueur, supported by the addition of a tablespoon of finely grated lemon zest to the cake recipe. Beyond that Aunt Frances’ version of Pocohantas’ loving gift to John Smith rules supreme. So here it is along with my humble embellishment.
The Kitching/Pocohantas Smith Island Cake
For a ten-layer cake:
-
2 sticks unsalted butter at room temperature
-
3 cups flour plus extra for dusting pans
-
1/4 teaspoon salt
-
1 1/2 teaspoons baking powder
-
2 cups sugar divided
-
1 tbsp. finely grated lemon zest
-
5 large eggs
-
1 cup evaporated milk
-
2 tsp. vanilla extract
-
1/2 cup water
For the Galliano syrup:
-
1/2 cup sugar
-
1/2 cup water
-
2/3 cup Galliano (or more why don’t you)
For the filling and icing:
-
2 1/2 cups sugar
-
1 1/2 cups evaporated milk
-
6 oz. unsweetened chocolate chopped
-
1 stick unsalted butter
-
1 tsp. vanilla extract
Note: the amounts for filling and icing specified in the Washington Post recipe are not adequate for spreading on ten layers and covering the outside surface of the cake. The amounts have been adjusted upward accordingly.
 Preheat oven to 350 degrees. Butter the cake pans generously and cover with flour. Shake off excess flour.
Sift flour, salt and baking powder. Beat butter and sugar together in electric mixer until smooth. Add eggs one at a time. Reduce speed and add the lemon zest and dry ingredients one cup at a time. Add evaporated milk, vanilla and water and beat until well combined.
Place 1 and 1/3 cups batter into each of two 9-inch cake pans spreading as evenly as possible. Bake for about 15 minutes or until you hear no sizzling in the pan (don’t stick your head in the oven to conduct this test). Meanwhile make the icing.
Combine the sugar and evaporated milk in a medium saucepan over medium-low heat. Add the butter and chocolate and stir constantly until all is combined and melted. Cook at medium heat for an addition ten minutes. Remove from the heat and add the vanilla. The icing will be thin but will thicken when cool.
Remove the cakes and place on a bakers rack. Repeat the baking cycle with the two pans cleaned, rebuttered and floured. Proceed to the Galliano.
Do not drink the Galliano until you are sure you have enough for the syrup. Heat the sugar, water and Galliano in a saucepan until completely dissolved. Set aside. You should have around 1 1/2 cups.
Bake the last pan with the remaining batter. Meanwhile begin slicing the 5 double layer cakes with a long thin knife just as you would butterfly a chicken breast. Work carefully all along the cake edge until you feel the layers separating completely. If you carry this out without tearing the layers reward yourself with the remaining Galliano.
Place the first layer on a cake platter, cut side up. Brush with the Galliano syrup, spread a thin layer of chocolate filling and repeat the process until all layers are dressed. Use the remaining filling to ice the sides and top of the cake.
You are done.


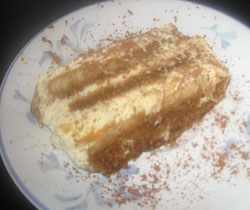
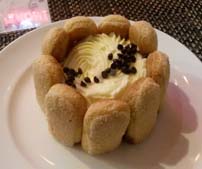
 P.S. I was struck by the tasty version produced by a not-yet-well known Italian trattoria located in Rehoboth Beach DE called A Touch of Italy. Note the lady fingers in this version cannot be doused in espresso coffee otherwise they would not stand up to look like the Stonehenge monument. Hence we classify this version as ‘druidic’ and non-traditional.